If there were ever one piece of content that was the source of inspiration for an entire food blog, it would be the following:
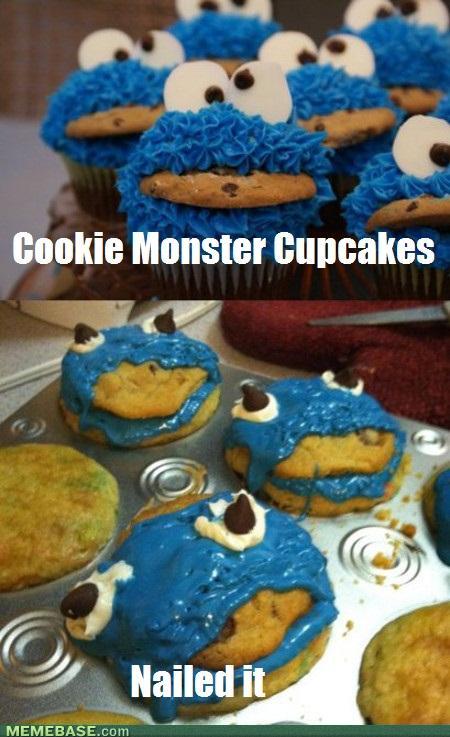
I remember seeing this meme years ago. After the hilarity and humor of the entire comparison run its course, I couldn't help but wonder whether or not there was a single point of failure or if Pinterest inspiration struck an individual completely befuddled to the ways of baking. While by no means do I consider myself even an amateur, hobbyist baker, if I were to try and implement the same thing would my creation end up visually similar?
So, after years of pondering the possibility of such, I've finally elected to embark on this culinary curiosity and measure the results against this legendary meme.
Working Theory
Not wise to the ways of frosting or cake/pastry decoration of any sort, the main thing that stood out to me was that the frosting seems to have been placed on a hot or warm cupcake such that the frosting broke down to a puddled mess. So, all I need to do is let the cupcakes cool before I frost them and I'm solid...right!? Let's put it to the test!
Process Flow
We'll go through the following steps/substeps to make these meme cupcakes:
- We'll make the "eyes" for the cupcakes
- We'll make the cupcakes, using a recipe found on The Spruce Eats
- We'll make a buttercream frosting, using general frosting principles found across the internet
- We'll assemble the cupcakes!
Note: In addition to some informational text, the image sliders below will provide a visualization of how the cupcakes were made and assembled. Hopefully, the combination of the two mediums will provide enough insight should you want to try this out yourself. All that said, let's get started!
Cupcake Eyeballs
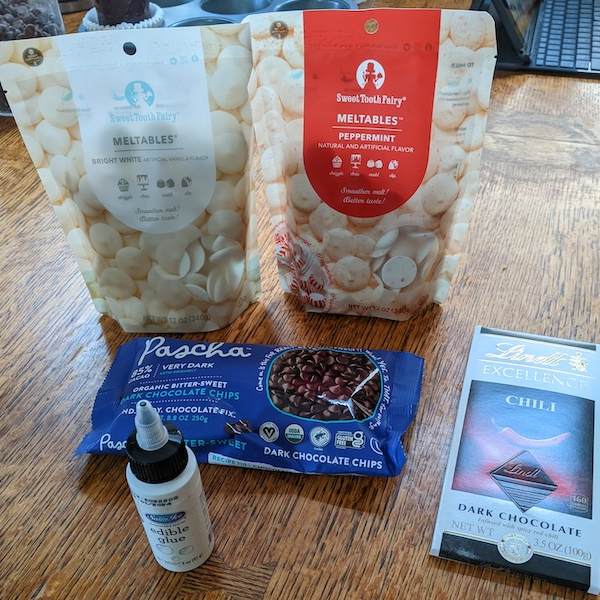
Ingredients:
- Approximately 24 melting wafers, usually available in the baking aisle of specialty craft stores or big-box retailers
- Approximately 24 milk or dark chocolate chips
- 1 chocolate bar
- An edible liquid binder
Preparation Steps
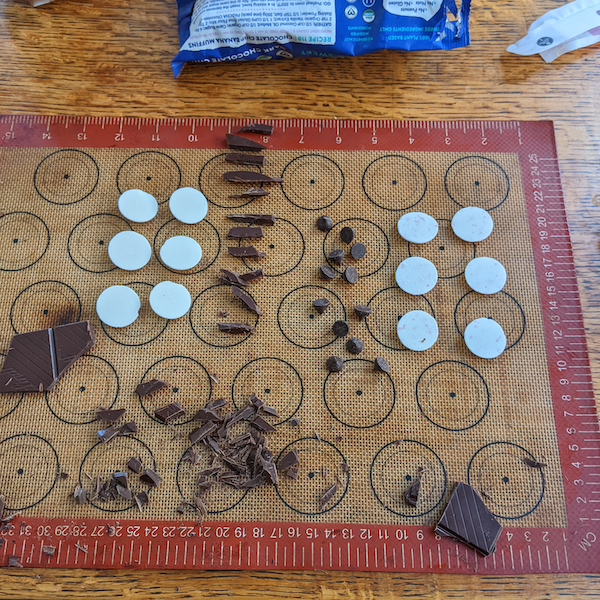
- Gather the ingredients above.
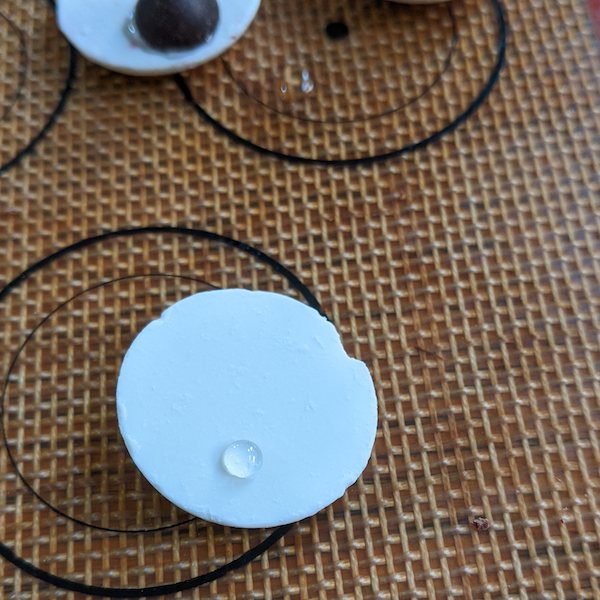
- Place the candy discs flat-side up. Most may have a flattened teardrop shape, so make sure you're working with the flat part as it makes preparation much easier.
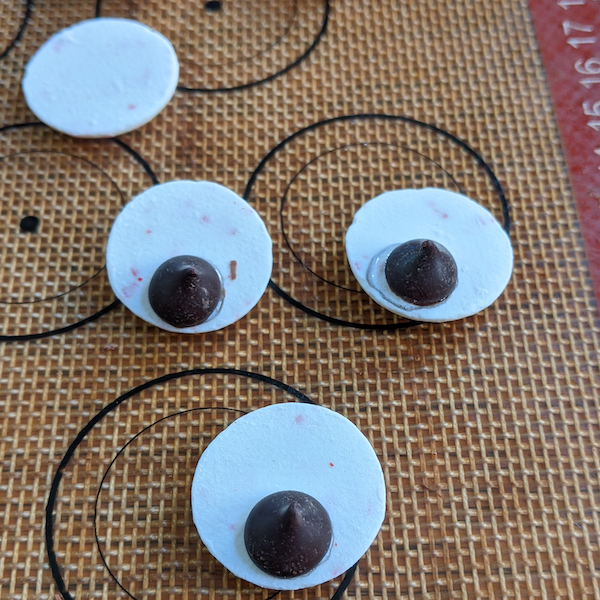
- Take your edible adhesive and place a small droplet on the candy disc's flat surface. Alternatively, you can place a droplet on the flat side of a chocolate chip. (see pictures in the slider below)
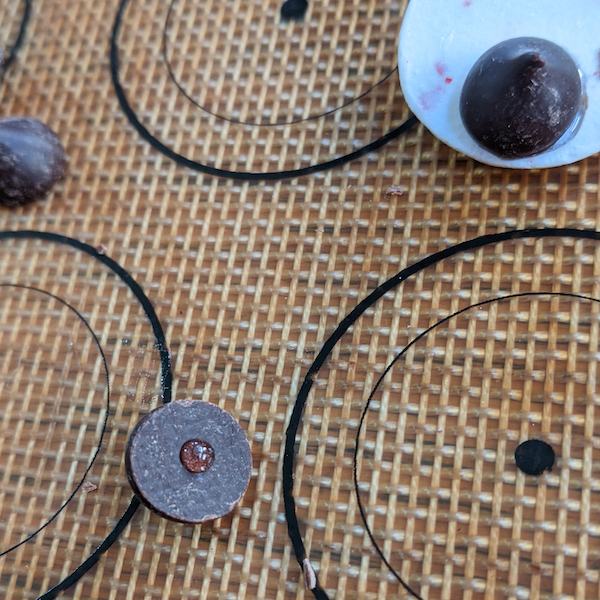
- Place the chocolate chip, flat side down, on top of the candy disc. Press gently and hold for a few seconds.
- Repeat the process (steps 3-4) for however many eyes you'd like to make.
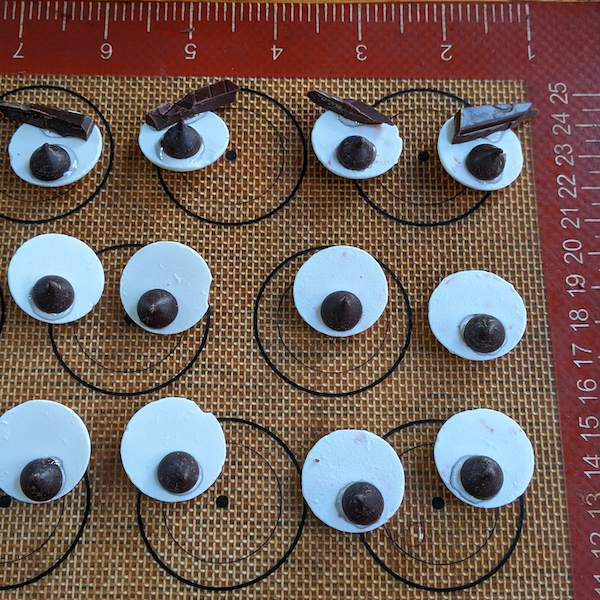
- (Optional) Take a candy bar and break it into thin strips using a knife or other breaking method.
- Using a similar method outlined in steps 3 & 4, apply over the chocolate chip to create a makeshift eyebrow
For visuals, take a look at the slideshow below:
Notes:
- The example above uses a store-bought edible adhesive mostly for the sake of simplicity. Alternatively, a mixture of corn syrup and water would also serve a similar purpose.
- The "pupils" of the eyes are based on the size of the chocolate chips used, especially compared against the base of the candy discs. Feel free to use whatever size of chocolate chip that serves your purpose!
- Additionally, many options are available for "eyebrows" beyond broken-up candy bar chunks. Licorice, taffy, or any other strip-like candy or pastry...even fondant should you want to go down that route, can be used to create an eyebrow effect.
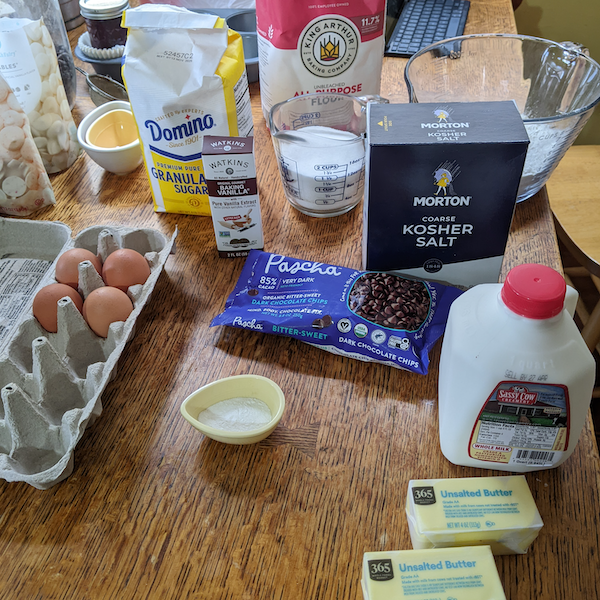
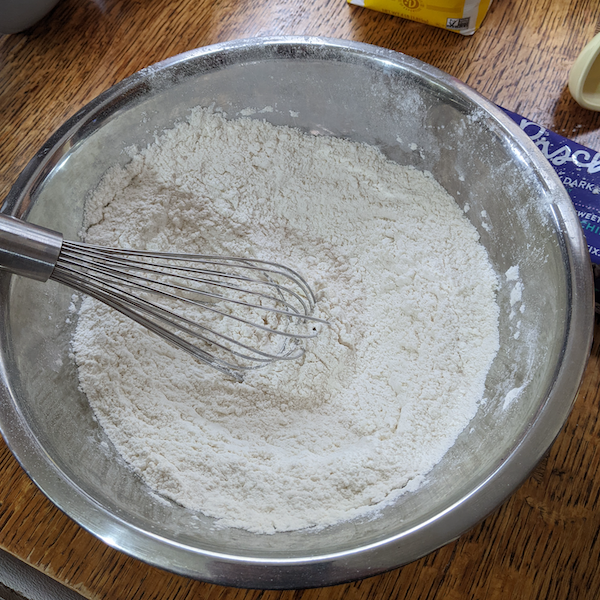
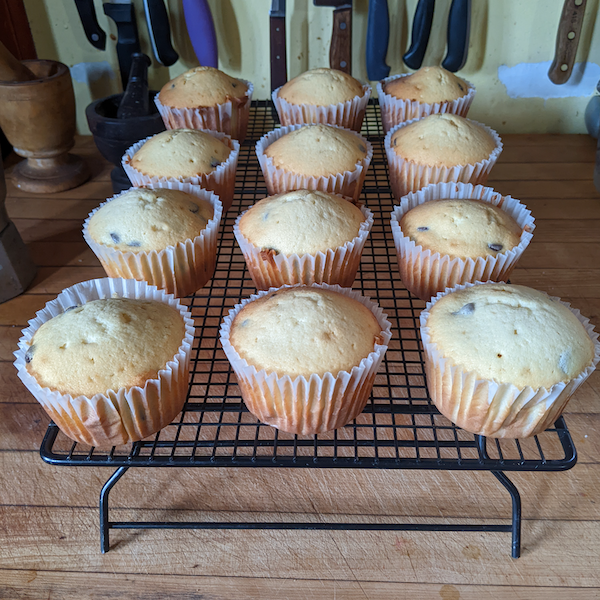
Cupcakes
As noted above, this implementation is using an existing cupcake recipe. It yielded 12 reasonably-sized cupcakes, and the recipe itself was easy to follow. Check out the slideshow below for pictures of the preparation steps!
Notes:
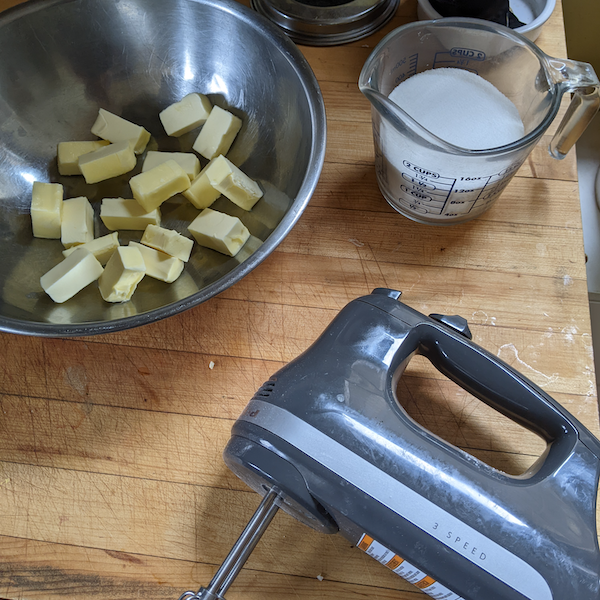
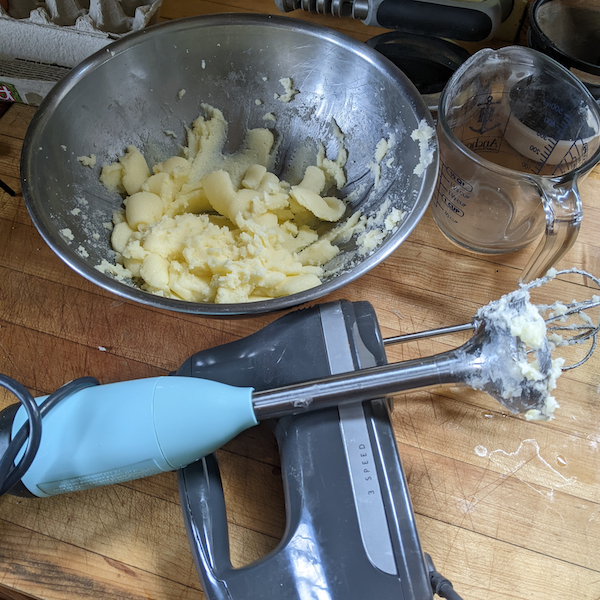
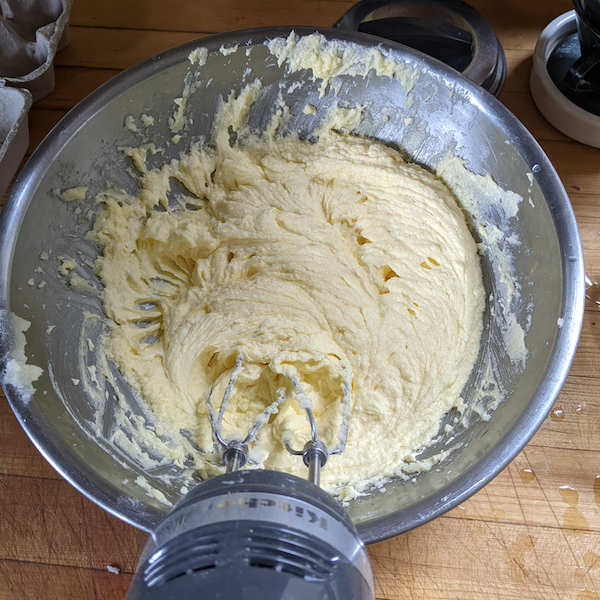
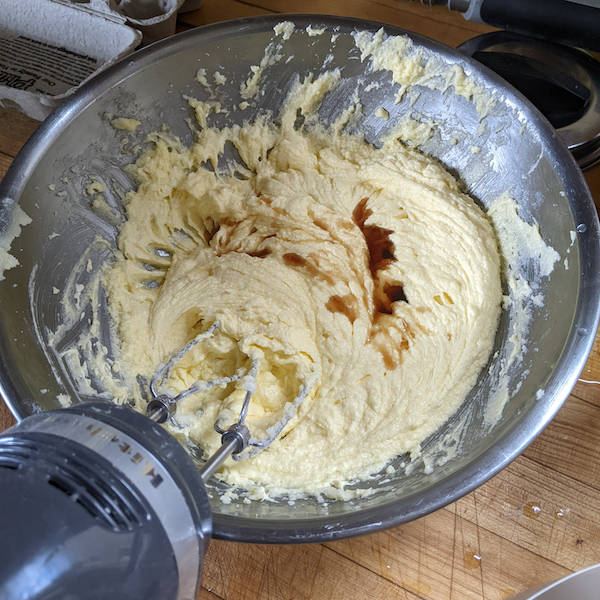
- Ideally, the butter will have sat at room temperature for at least 3-6 hours to help with mixing the sugar. You may notice an immersion blender in the 3rd slide...yeah that could be controversial in some baking circles...but since a basic hand mixer was slow in mixing the ingredients I decided to amp up the approach. In this case it may have been beneficial as a fast moving blade usually has a tendency of adding micro-bubbles to a mixture (which leads to the controversy of convenience vs. a more methodical approach), and the mixture helped mix as the eggs were added.
- Adding the eggs one at a time was definitely helpful. Not to distract from the recipe and meme-execution itself, but in going through this process I was reminded of an experience from my childhood days; in middle school back in my time, we had a Home Economics course, and in one of the classes everyone was split into groups to bake a cake. Though the teacher was a bit of a clown with a reputation of questionable teaching, a group of students complained that there were chunks of egg in the cake they made, without much reaction from the teacher. Not only that, but they later complained to one of the school counselors about how their cake had chunks of egg in it! Millennials, I'm tellin' you...🙄
- Distractions aside, a somewhat important detail the slides missed was putting the cake batter into a cupcake/muffin pan. I used simple paper cupcake liners, without shortening or non-stick spray, filled slightly over half-full with batter. The resulting cupcakes are displayed on the last slide, slightly golden in color with some variation based on the position in the oven.
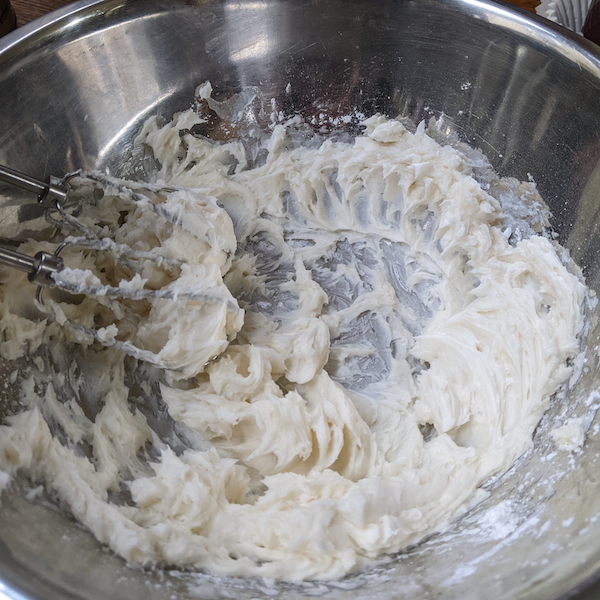
Frosting
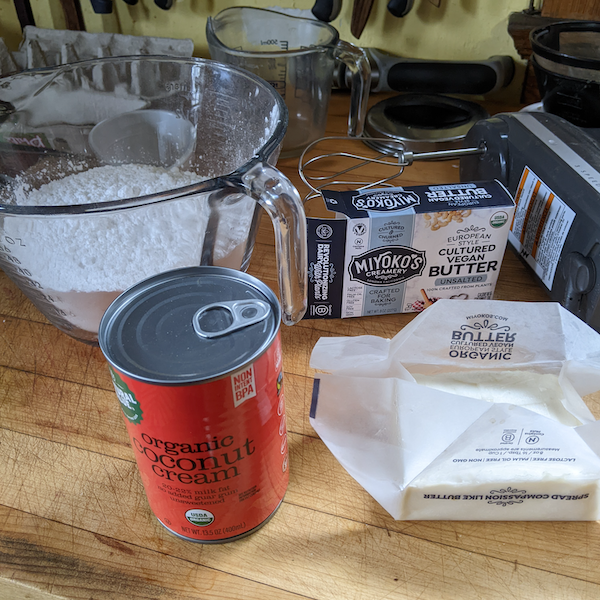
In making an attempt to, at the very least, move toward a broadened diet that accommodates to dietary restrictions I thought I'd start with trying to make a vegan frosting. While going full-on with a vegan, gluten-free implementation of cupcakes would have been a noble endeavor, I honestly don't have a good-enough foundation of the fundamentals (like making a flax egg or other substitutions for binding ingredients, the consistency of different flours outside of traditional wheat/gluten flours, etc.) to have executed this meme with a reasonable chance of success. That said, it is important to at least take a step toward food inclusivity while trying to retain flavor properties of mainstream products, so here we are. Please check out the slideshow below!
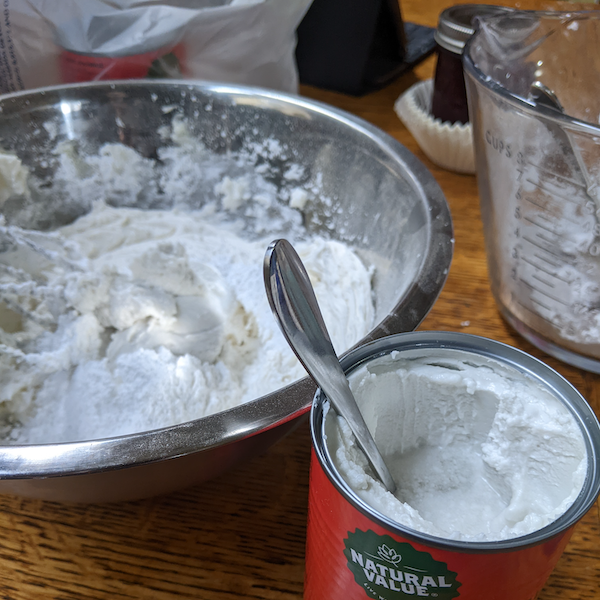
Vegan Buttercream Frosting Ingredients
- 1 cup vegan butter or spread (Miyokos Vegan Butter was used for this frosting)
- 3 1/2 cups confectioners sugar
- A scoop of coconut cream
- Natural or artificial colors

Notes
- As vegan alternatives to butter are becoming increasingly accessible in even mainstream grocery and big-box stores, it is definitely worth it to at least try a substitution in something that calls for butter. I partially favor Miyoko's over Earth Balance, not necessarily as it's a better product over the other, but they have quite a lot going on organizationally...within the past few years they got a favorable ruling against the California Department of Food & Agriculture over whether or not they can use terms like "dairy" or "butter" as a basis of their product descriptions. Additionally, the company filed a lawsuit earlier in 2023 against their namesake founder over theft of proprietary information. At time of writing, the suit is pending. Long story short, drama-free alternative -> probably Earth Balance...Tea-infused, figuratively speaking -> Miyoko's
- In mixing the sugar and vegan butter together, I found it effective to mix the sugar in small batches, roughly sifting before running the mixer.
- While the coconut cream was probably not a necessary step, it did seem to add a bit of flavor, and it gave the frosting a bit more of a whipped texture after mixing.
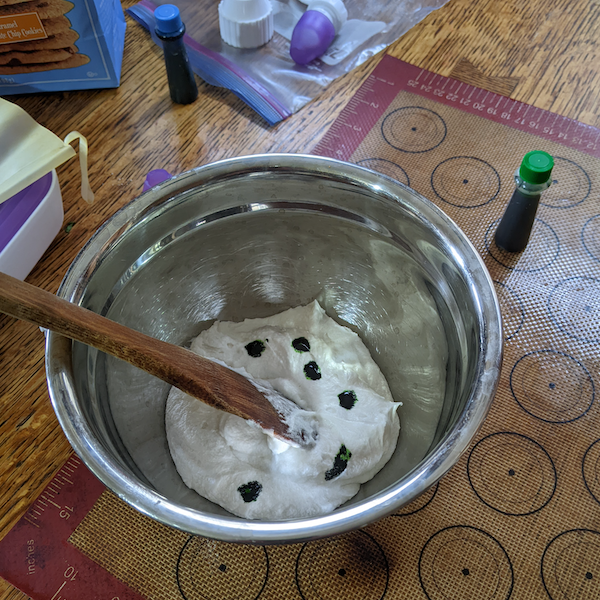
- To make a green frosting, I added about 5 drops of blue food dye to about 19-20 drops of green frosting, with about half of the frosting mixture.
- The blue frosting in the slide above used about 10-12 drops.
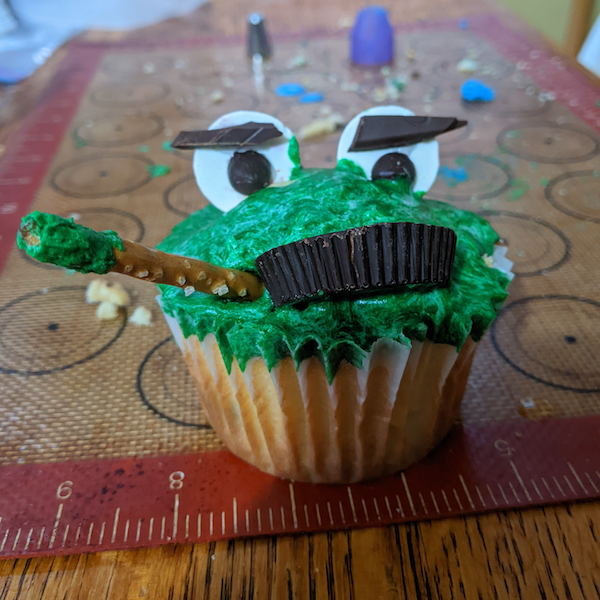
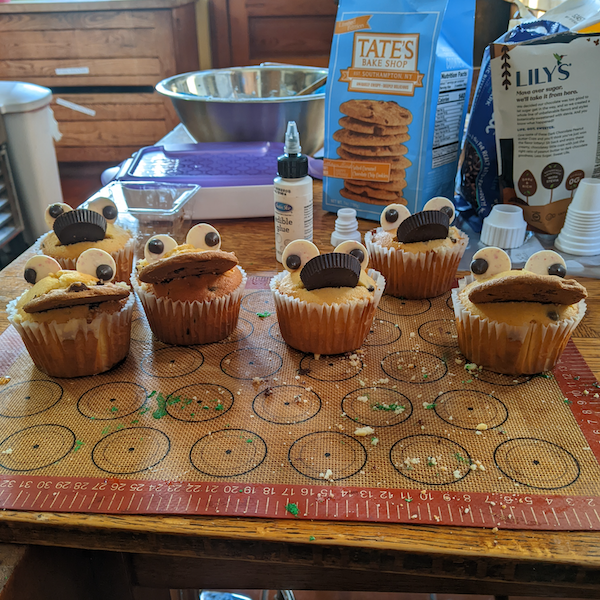
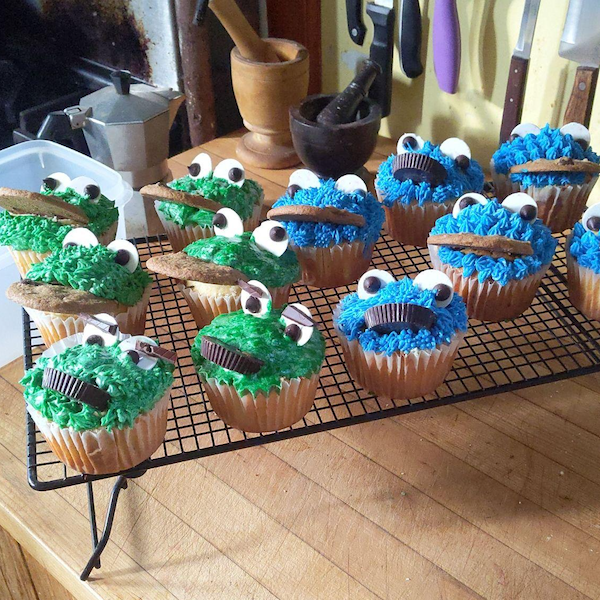
Putting it All Together...The Moment of Truth
At this point the cupcakes were cooled, the frosting was good to go, the eyes were glued and everything was ready for assembly. How did everything turn out? See the slides below!


Notes/Conclusion
Overall, while it's no Pinterest inspiration, I can at least say that I did not end up with a frosted puddle. The most surprising lesson learned is that after the frosting was placed in a piping bag and ready for topping, I noticed that the frosting was becoming more puddly as I progressed. It might be a fair conclusion that the temperature change from simply holding the piping bag could vary the results. Oddly enough, the frosting held its shape at room temperature once it was on the cupcake. As I do this type of stuff I'll definitely keep note, and any first-timer should be mindful of this as well.
In terms of the treats over the top of the cupcakes, I simply ended up using store-bought, prepackaged cookies and peanut butter cups. Should you try and re-create this type of cupcake, you should definitely use what matches your tastes, brand preferences, and imagination!
As a final note to this experiment...it is worth noting that the actual baking and preparation took place on April 20th (lol 420 yo). Though the blog aims to be family-friendly and for a broad audience, I can't help but to nod to the day that has cultural significance to a broad community. As such, my dude to the side here pays his respects 👉 👉